Answer the question
In order to leave comments, you need to log in
How to use the Arduino Nano?
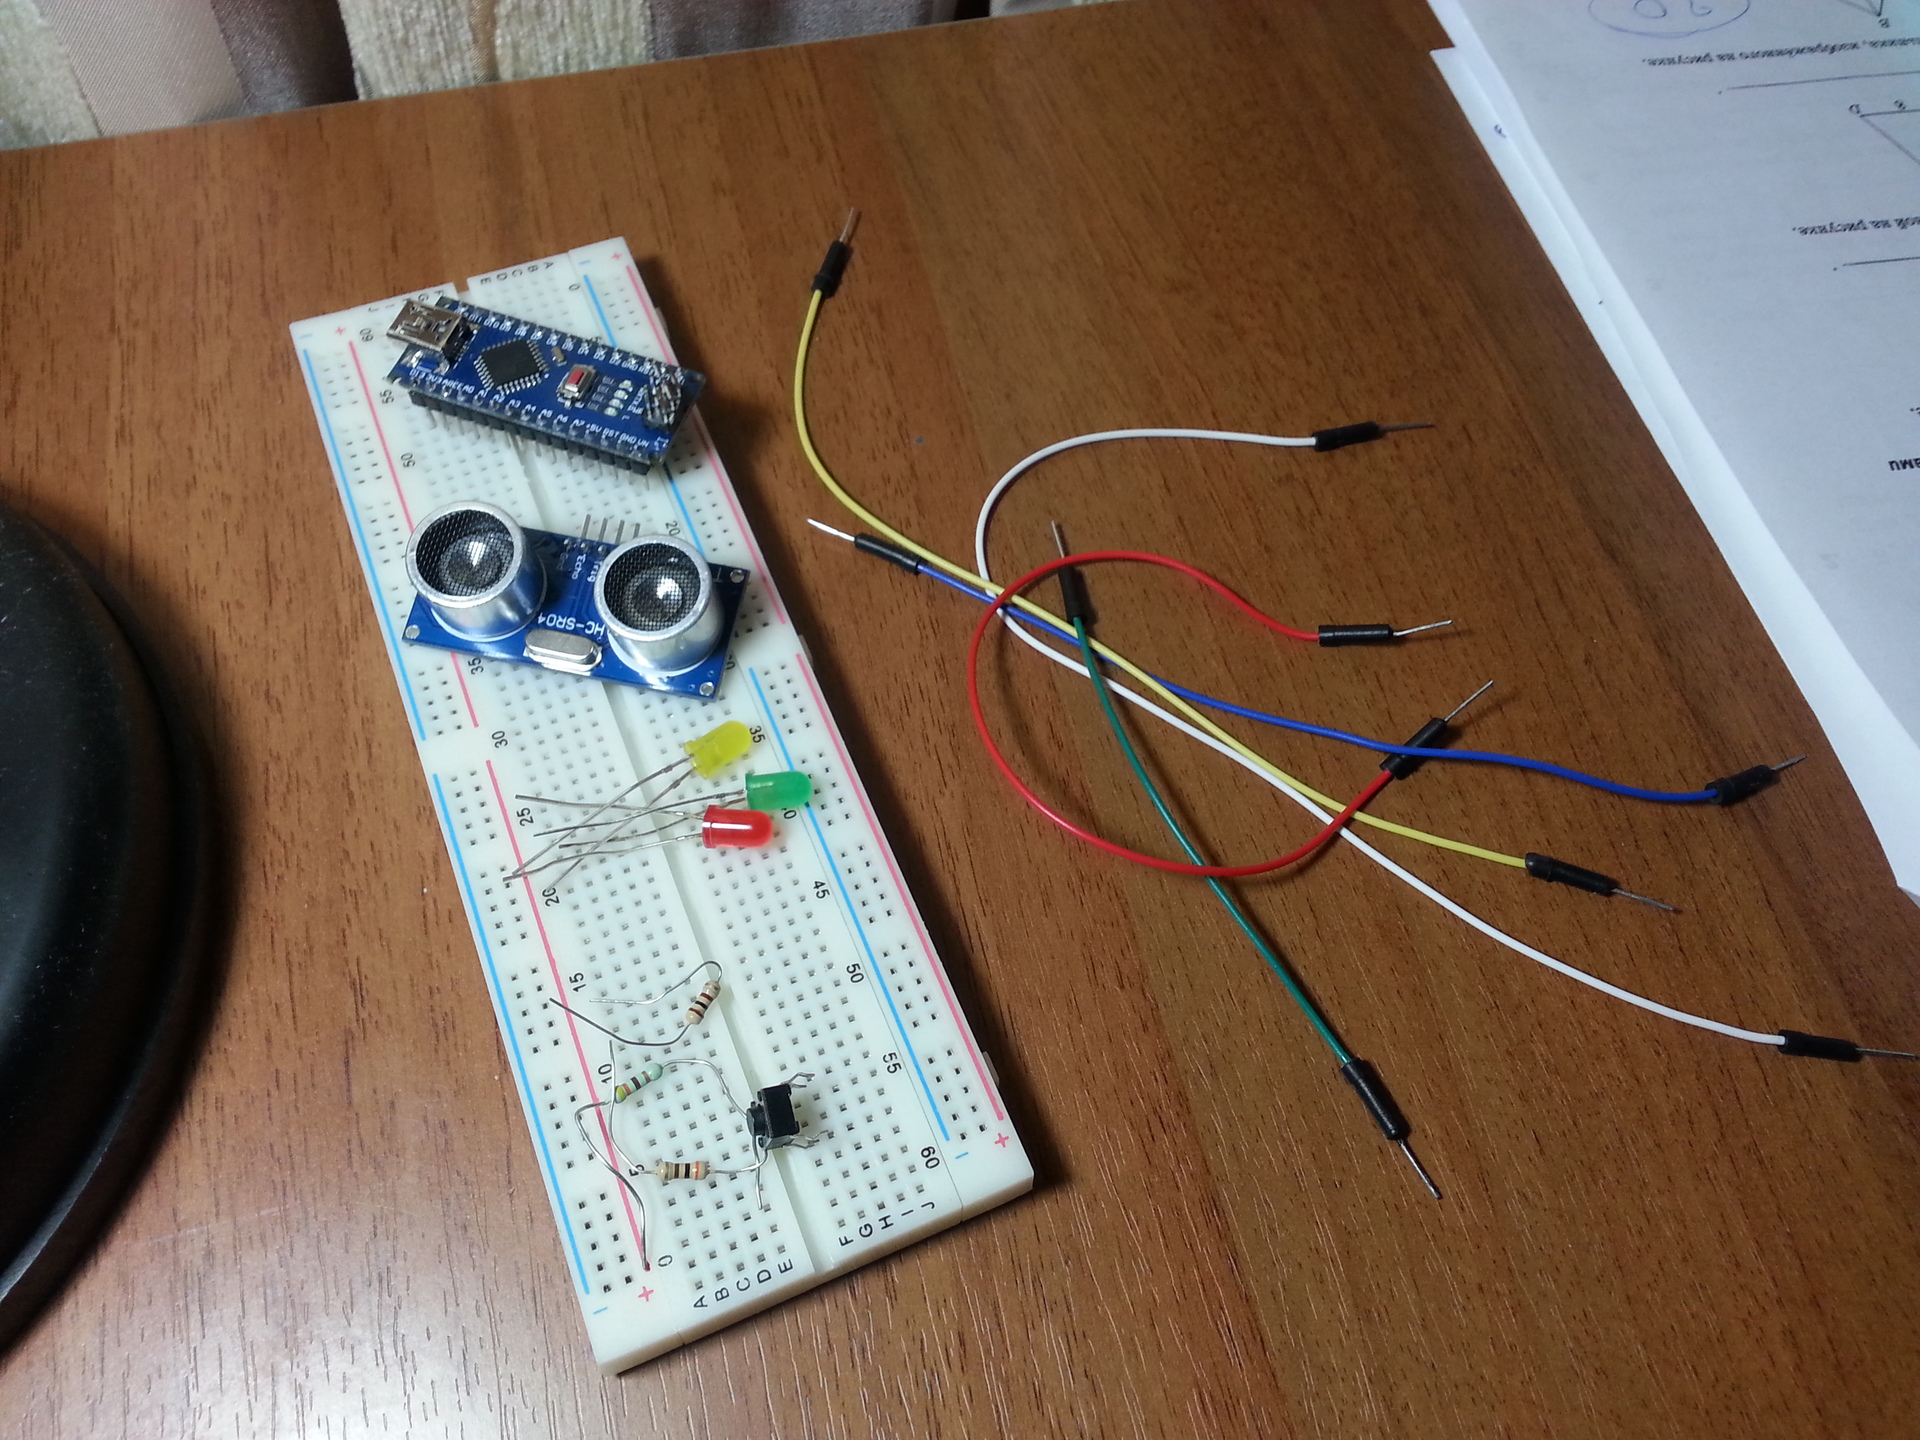
–î–æ–±—Ä—ã–π –¥–µ–Ω—å. –ù–µ–≤–∞–∂–Ω–æ –∫–∞–∫ –∏ –ø–æ—á–µ–º—É, –Ω–æ –º–Ω–µ –¥–∞–ª–∏ Arduino Nano (–Ω–µ —É–≤–µ—Ä–µ–Ω), 3 –ª–∞–º–ø–æ—á–∫–∏, 3 —Ä–µ–∑–∏—Å—Ç–æ—Ä–∞ (—Ç—Ä–∞–Ω–∑–∏—Å—Ç–æ—Ä–∞?), –¥–∞—Ç—á–∏–∫ —Ä–∞—Å—Å—Ç–æ—è–Ω–∏—è, –ø–ª–∞—Ç—É, –∫—É–¥–∞ –≤—Å–µ —ç—Ç–æ –≤—Ç—ã–∫–∞–µ—Ç—Å—è –∏ –∫—É—á—É –ø—Ä–æ–≤–æ–¥–æ–≤. –í–æ–∑–º–æ–∂–Ω–æ –≥–¥–µ-—Ç–æ –æ—à–∏–±—Å—è, —Ç–∞–∫ —á—Ç–æ –ø—Ä–∏–∫—Ä–µ–ø–ª—è—é —Ñ–æ—Ç–æ. –ü—Ä–æ–±–ª–µ–º–∞ –≤ —Ç–æ–º, —á—Ç–æ —è –Ω–µ –∑–Ω–∞—é, –∫–∞–∫ —ç—Ç–∏–º –ø–æ–ª—å–∑–æ–≤–∞—Ç—å—Å—è. –ù–µ —Ä–∞–∑–±–∏—Ä–∞—é—Å—å –≤ —ç–ª–µ–∫—Ç—Ä–æ–Ω–∏–∫–µ –∏ –º–∏–∫—Ä–æ–ø—Ä–æ—Ü–µ—Å—Å–æ—Ä–∞—Ö, –Ω–µ –∑–Ω–∞—é –°–∏. –í–æ –≤—Å–µ—Ö —É—á–µ–±–Ω—ã—Ö –ø–æ—Å–æ–±–∏—è—Ö –æ–ø–µ—Ä–∏—Ä—É—é—Ç –Ω–µ–∏–∑–≤–µ—Å—Ç–Ω—ã–º–∏ –º–Ω–µ –ø–æ–Ω—è—Ç–∏—è–º–∏ –∏ –≤ –∫–∞—á–µ—Å—Ç–≤–µ –ø—Ä–∏–º–µ—Ä–∞ –∏—Å–ø–æ–ª—å–∑—É—é—Ç Uno (–∞ —É –º–µ–Ω—è –Ω–µ Uno). –ß—Ç–æ –º–Ω–µ —Å–æ –≤—Å–µ–º —ç—Ç–∏–º –¥–µ–ª–∞—Ç—å –∏ –∫–∞–∫ —Ä–∞–∑–±–∏—Ä–∞—Ç—å—Å—è? –ß—Ç–æ —è –º–æ–≥—É —Å–¥–µ–ª–∞—Ç—å —Å —ç—Ç–∏–º —Å–∫—Ä–æ–º–Ω—ã–º –Ω–∞–±–æ—Ä–æ–º?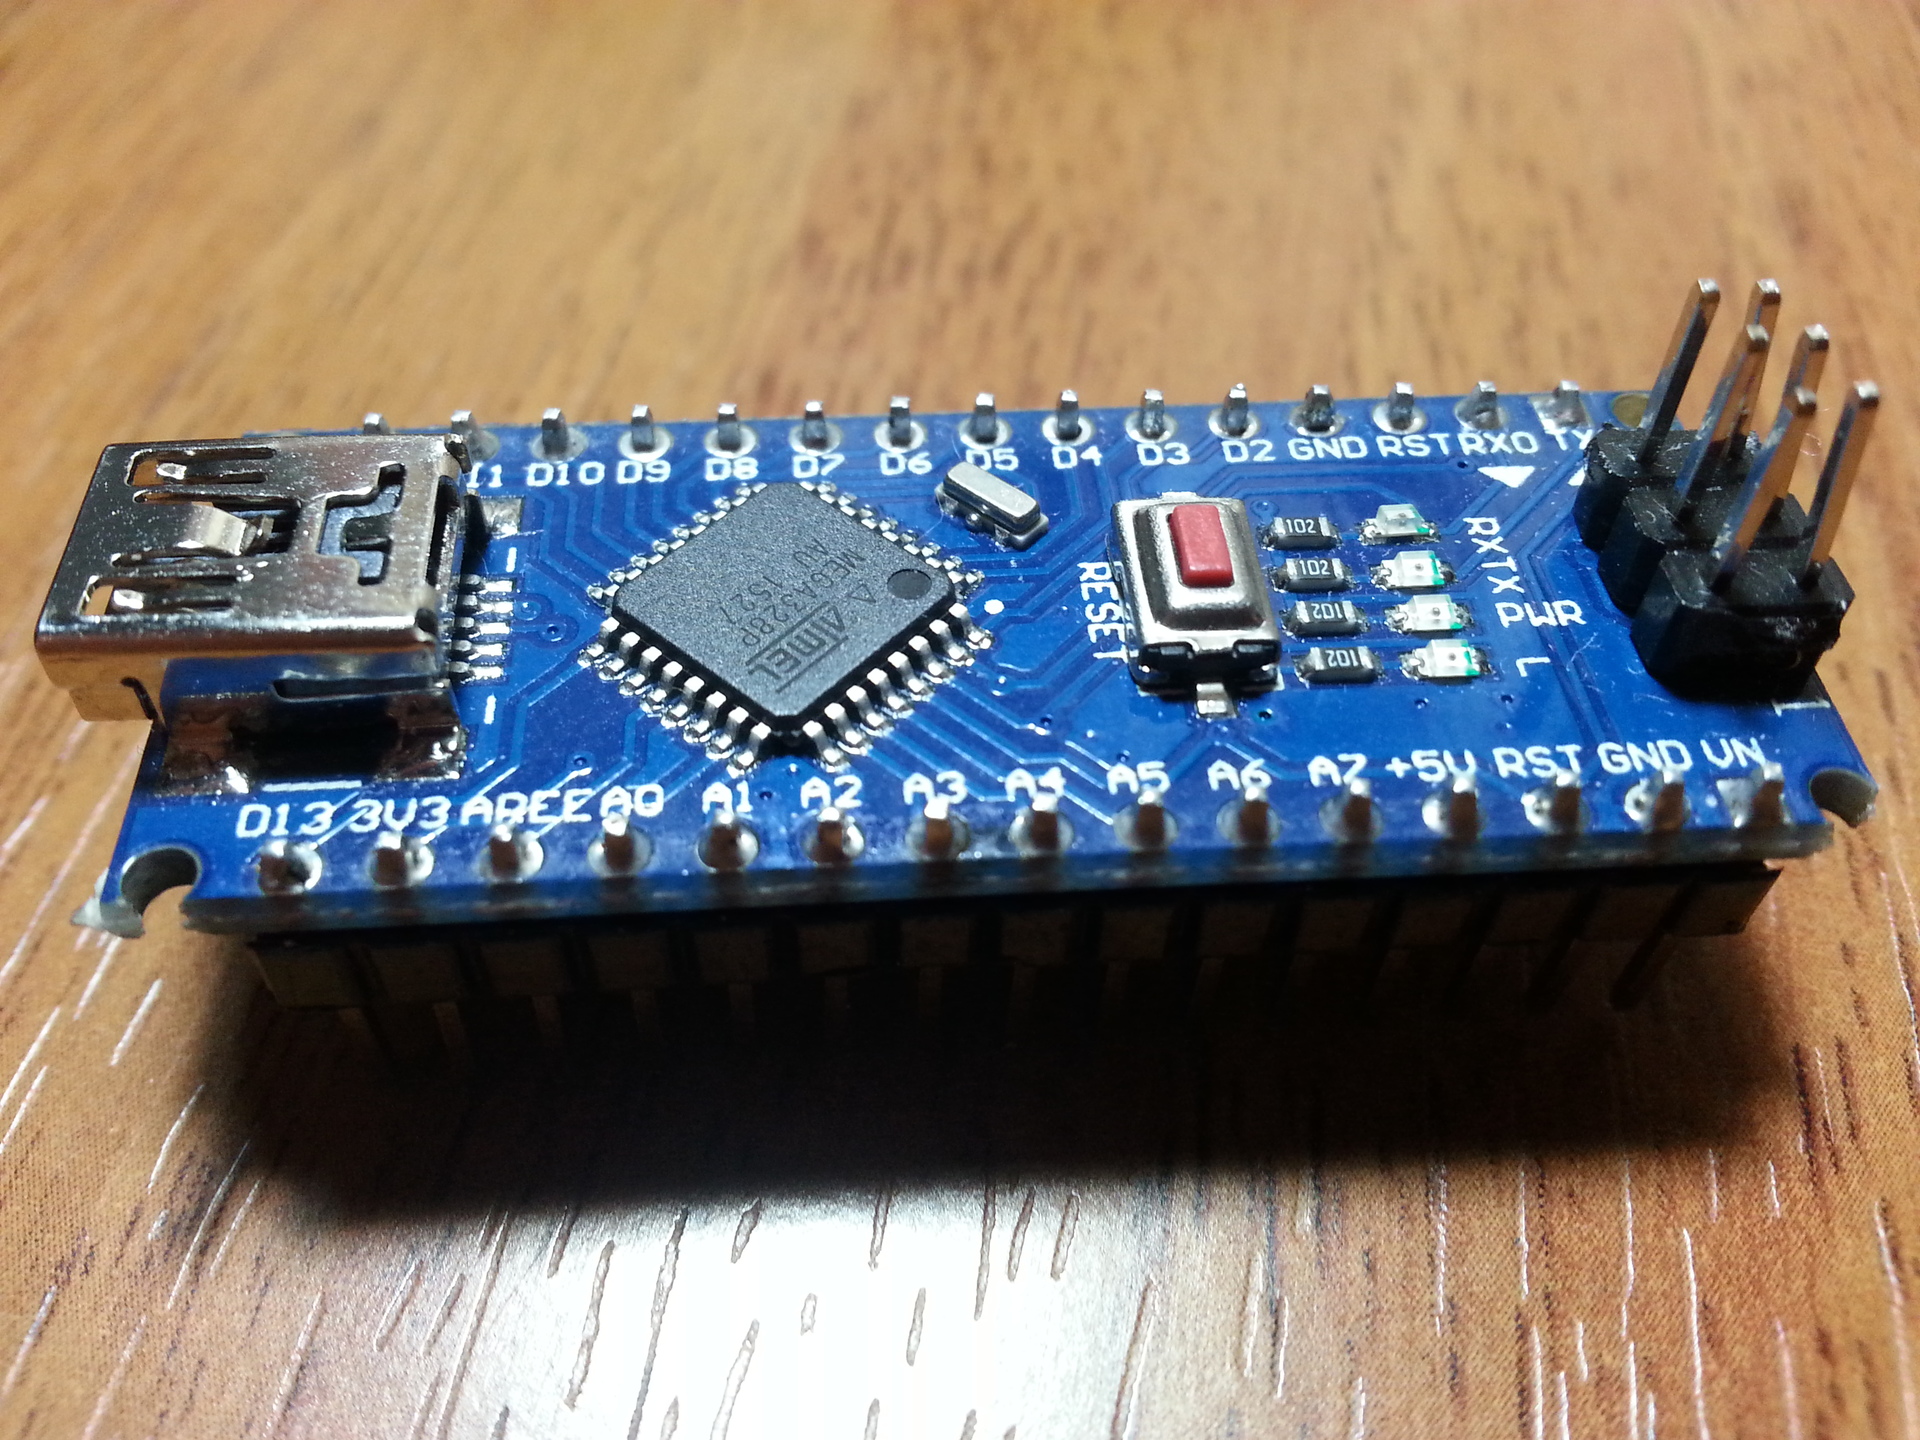
Answer the question
In order to leave comments, you need to log in
The arduino environment is quite versatile, for most projects it is easy to change the board from Uno to your Nano in the programming environment.
Judging by the 328p microcontroller, this is indeed nano.
The ports are all named similarly to the rest of the arduins.
And not light bulbs, but LEDs, turn on only with resistors.
Here is an excellent resource for beginners: wiki.amperka.ru
Read the theory and go ahead and repeat mini projects.
An ultrasonic sensor, probably like this: amperka.ru/product/hc-sr04-ultrasonic-sensor-dista... , there are links to libraries.
Arduino Nano (not sure)
Each output has a Name, first you need to find out what the outputs with certain names are used for.
With this kit you can make "Parktronic" - measuring distances to obstacles.
It is very easy to use. In real life, seven-year-old schoolchildren cope with this.
1. You need a USB-MiniUSB cable to connect the board to your computer
2. You need to download the driver for the RST232-USB adapter. On branded boards is FT232, on Chinese CH340. Look at the marking on the small microcircuit on the side of the pins next to the USB connector
3. When the board is connected to the computer, the red LED on the board should blink, which means the board is working and no one tormented it. If it does not burn, then most likely someone mocked her or she is faulty.
4. If you have identified a virtual COM port when connecting the board to the computer, you can proceed to step 5, otherwise, either the board is dead, or you did something wrong, return to step 1
5. Go here, –∫–∞—á–∞–µ–º Arduino IDE. –í–Ω–∏–º–∞—Ç–µ–ª—å–Ω–æ —á–∏—Ç–∞–µ–º –≤—Å–µ —á—Ç–æ –Ω–∞–ø–∏—Å–∞–Ω–æ –Ω–∞ —ç—Ç–æ–º —Å–∞–π—Ç–µ –∏ –≤–æ–æ–±—â–µ –≤ –∏–Ω–µ—Ç–µ
PS –ï—Å–ª–∏ –≤–∞–º —ç—Ç–æ –Ω–µ –∏–Ω—Ç–µ—Ä–µ—Å–Ω–æ, –ø–æ–¥–∞—Ä–∏—Ç–µ –≤—Å–µ —ç—Ç–æ –ª—é–±–æ–º—É —Å–æ—Å–µ–¥—Å–∫–æ–º—É –ø–∞—Ü–∞–Ω—É, —É–≤–µ—Ä–µ–Ω –æ–Ω –±—É–¥–µ—Ç —Å—á–∞—Å—Ç–ª–∏–≤.
Didn't find what you were looking for?
Ask your questionAsk a Question
731 491 924 answers to any question