G
G
Gravio2019-04-08 14:48:53
iPhone
Gravio, 2019-04-08 14:48:53

How to solve collection view auto size issue?

Without a call to reloadData(), it displays everything correctly, like this:
5cab342fa6f3c904156041.png
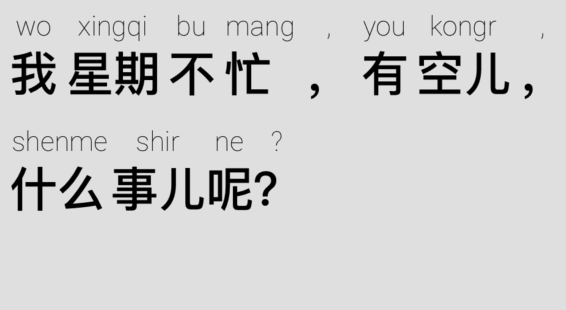
But after calling reloadData()
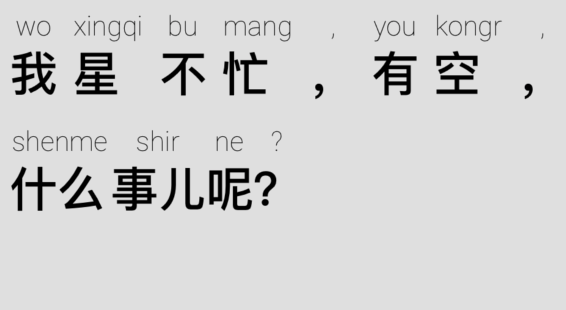
5cab346c21811072930954.png
or like this:
5cab3475c212a425216595.png
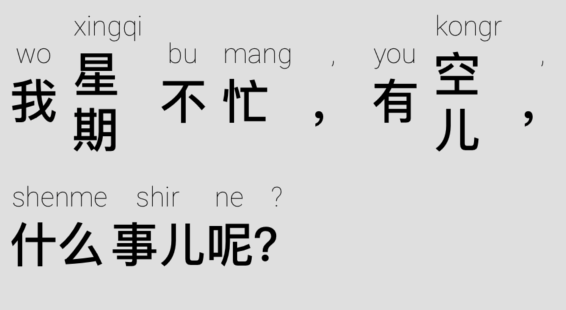
The problem occurs exactly after calling reloadData()
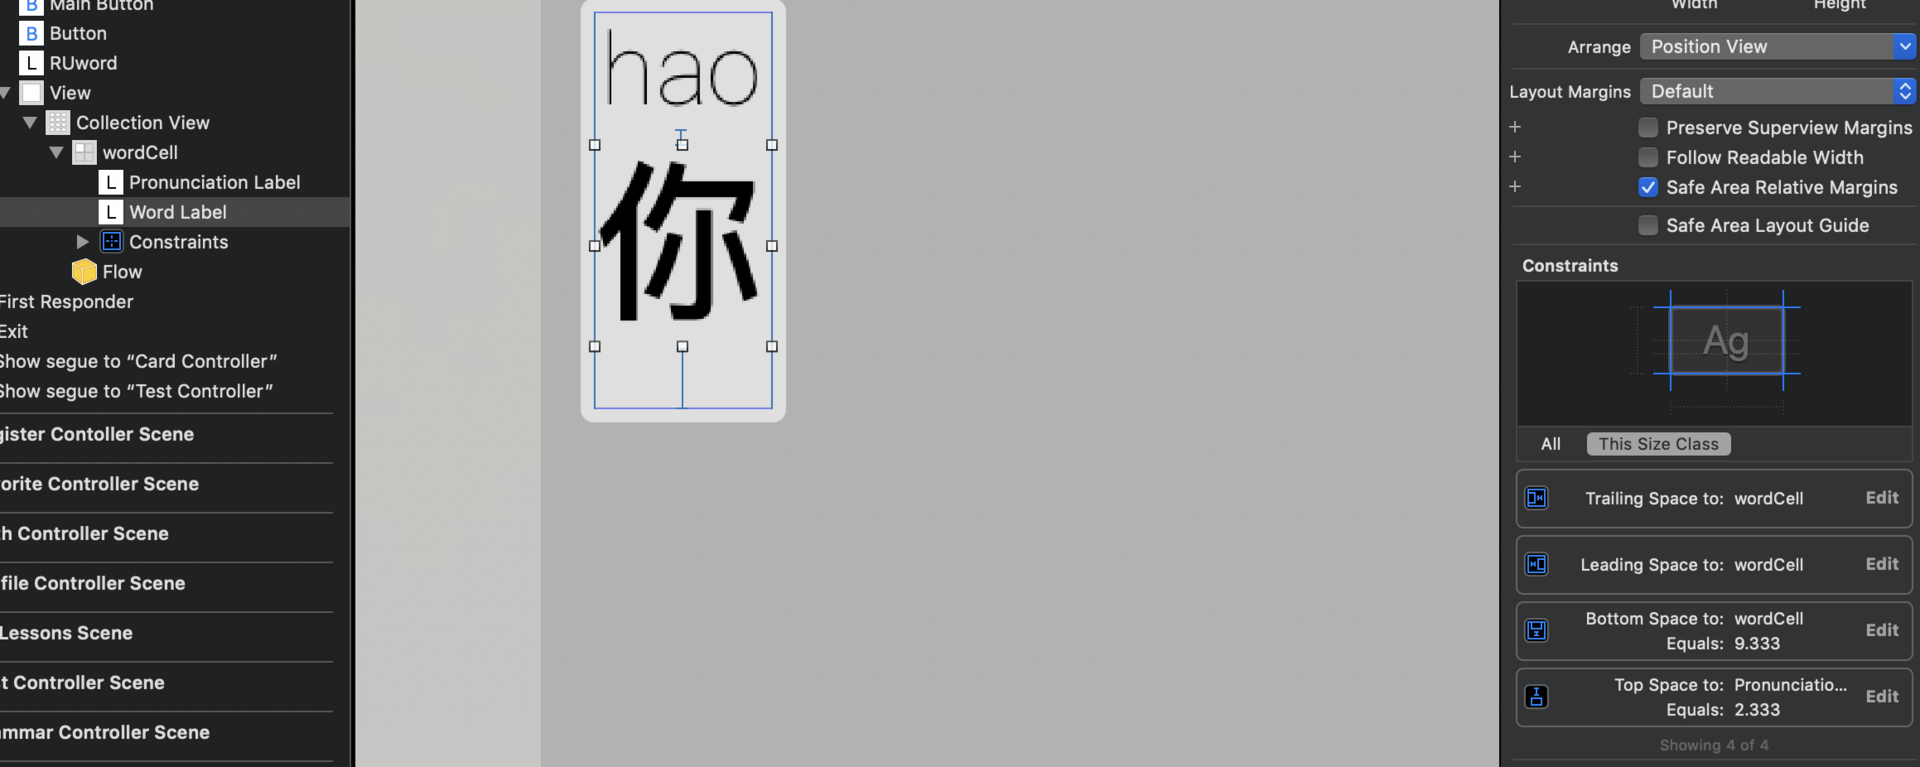
The collectionView cell code:

class ReadArticleCollectionViewCell: UICollectionViewCell
{
    @IBOutlet weak var pronunciationLabel: UILabel!
    @IBOutlet weak var wordLabel: UILabel!
    
    override func awakeFromNib() {
        super.awakeFromNib()
        
        contentView.translatesAutoresizingMaskIntoConstraints = false
        
        NSLayoutConstraint.activate([
            contentView.leftAnchor.constraint(equalTo: leftAnchor),
            contentView.rightAnchor.constraint(equalTo: rightAnchor),
            contentView.topAnchor.constraint(equalTo: topAnchor),
            contentView.bottomAnchor.constraint(equalTo: bottomAnchor)
        ])
    }
}

5cab34fc605e1293565315.png
In general, help is needed, why auto size breaks after reloadData()

Answer the question

In order to leave comments, you need to log in

1 answer(s)
D
doublench21, 2019-04-08
@Gravio

Because no one does that, well, except for you. For auto layout to work, you need to build a chain of restrictions from top to bottom.
In order not to ask what you have and what not, I will immediately write a complete list. /
1) Register the layout of the collection:

// ...
layout.estimatedItemSize = UICollectionViewFlowLayout.automaticSize
layout.itemSize = UICollectionViewFlowLayout.automaticSize

2) Lied, need clarification.
pronunciationLabel - How many lines should it take? (Only one?) Increases only in width?
wordLabel - Same as pronunciationLabel? Or increasing in height?
3) This nonsense should never be done again.
contentView.translatesAutoresizingMaskIntoConstraints = false
   
        NSLayoutConstraint.activate([
            contentView.leftAnchor.constraint(equalTo: leftAnchor),
            contentView.rightAnchor.constraint(equalTo: rightAnchor),
            contentView.topAnchor.constraint(equalTo: topAnchor),
            contentView.bottomAnchor.constraint(equalTo: bottomAnchor)
        ])

Clarification received. Let's continue.
To begin with, let's clarify how we achieve the dynamic size of the view in width and height. Let me give you a simple and clear example. I will create views and put two labels there. I write everything exclusively in code, because I do not use a storyboard, but I think it will not be a problem to reduce. So:
5cab4bce2a9a6308684642.png
Text code
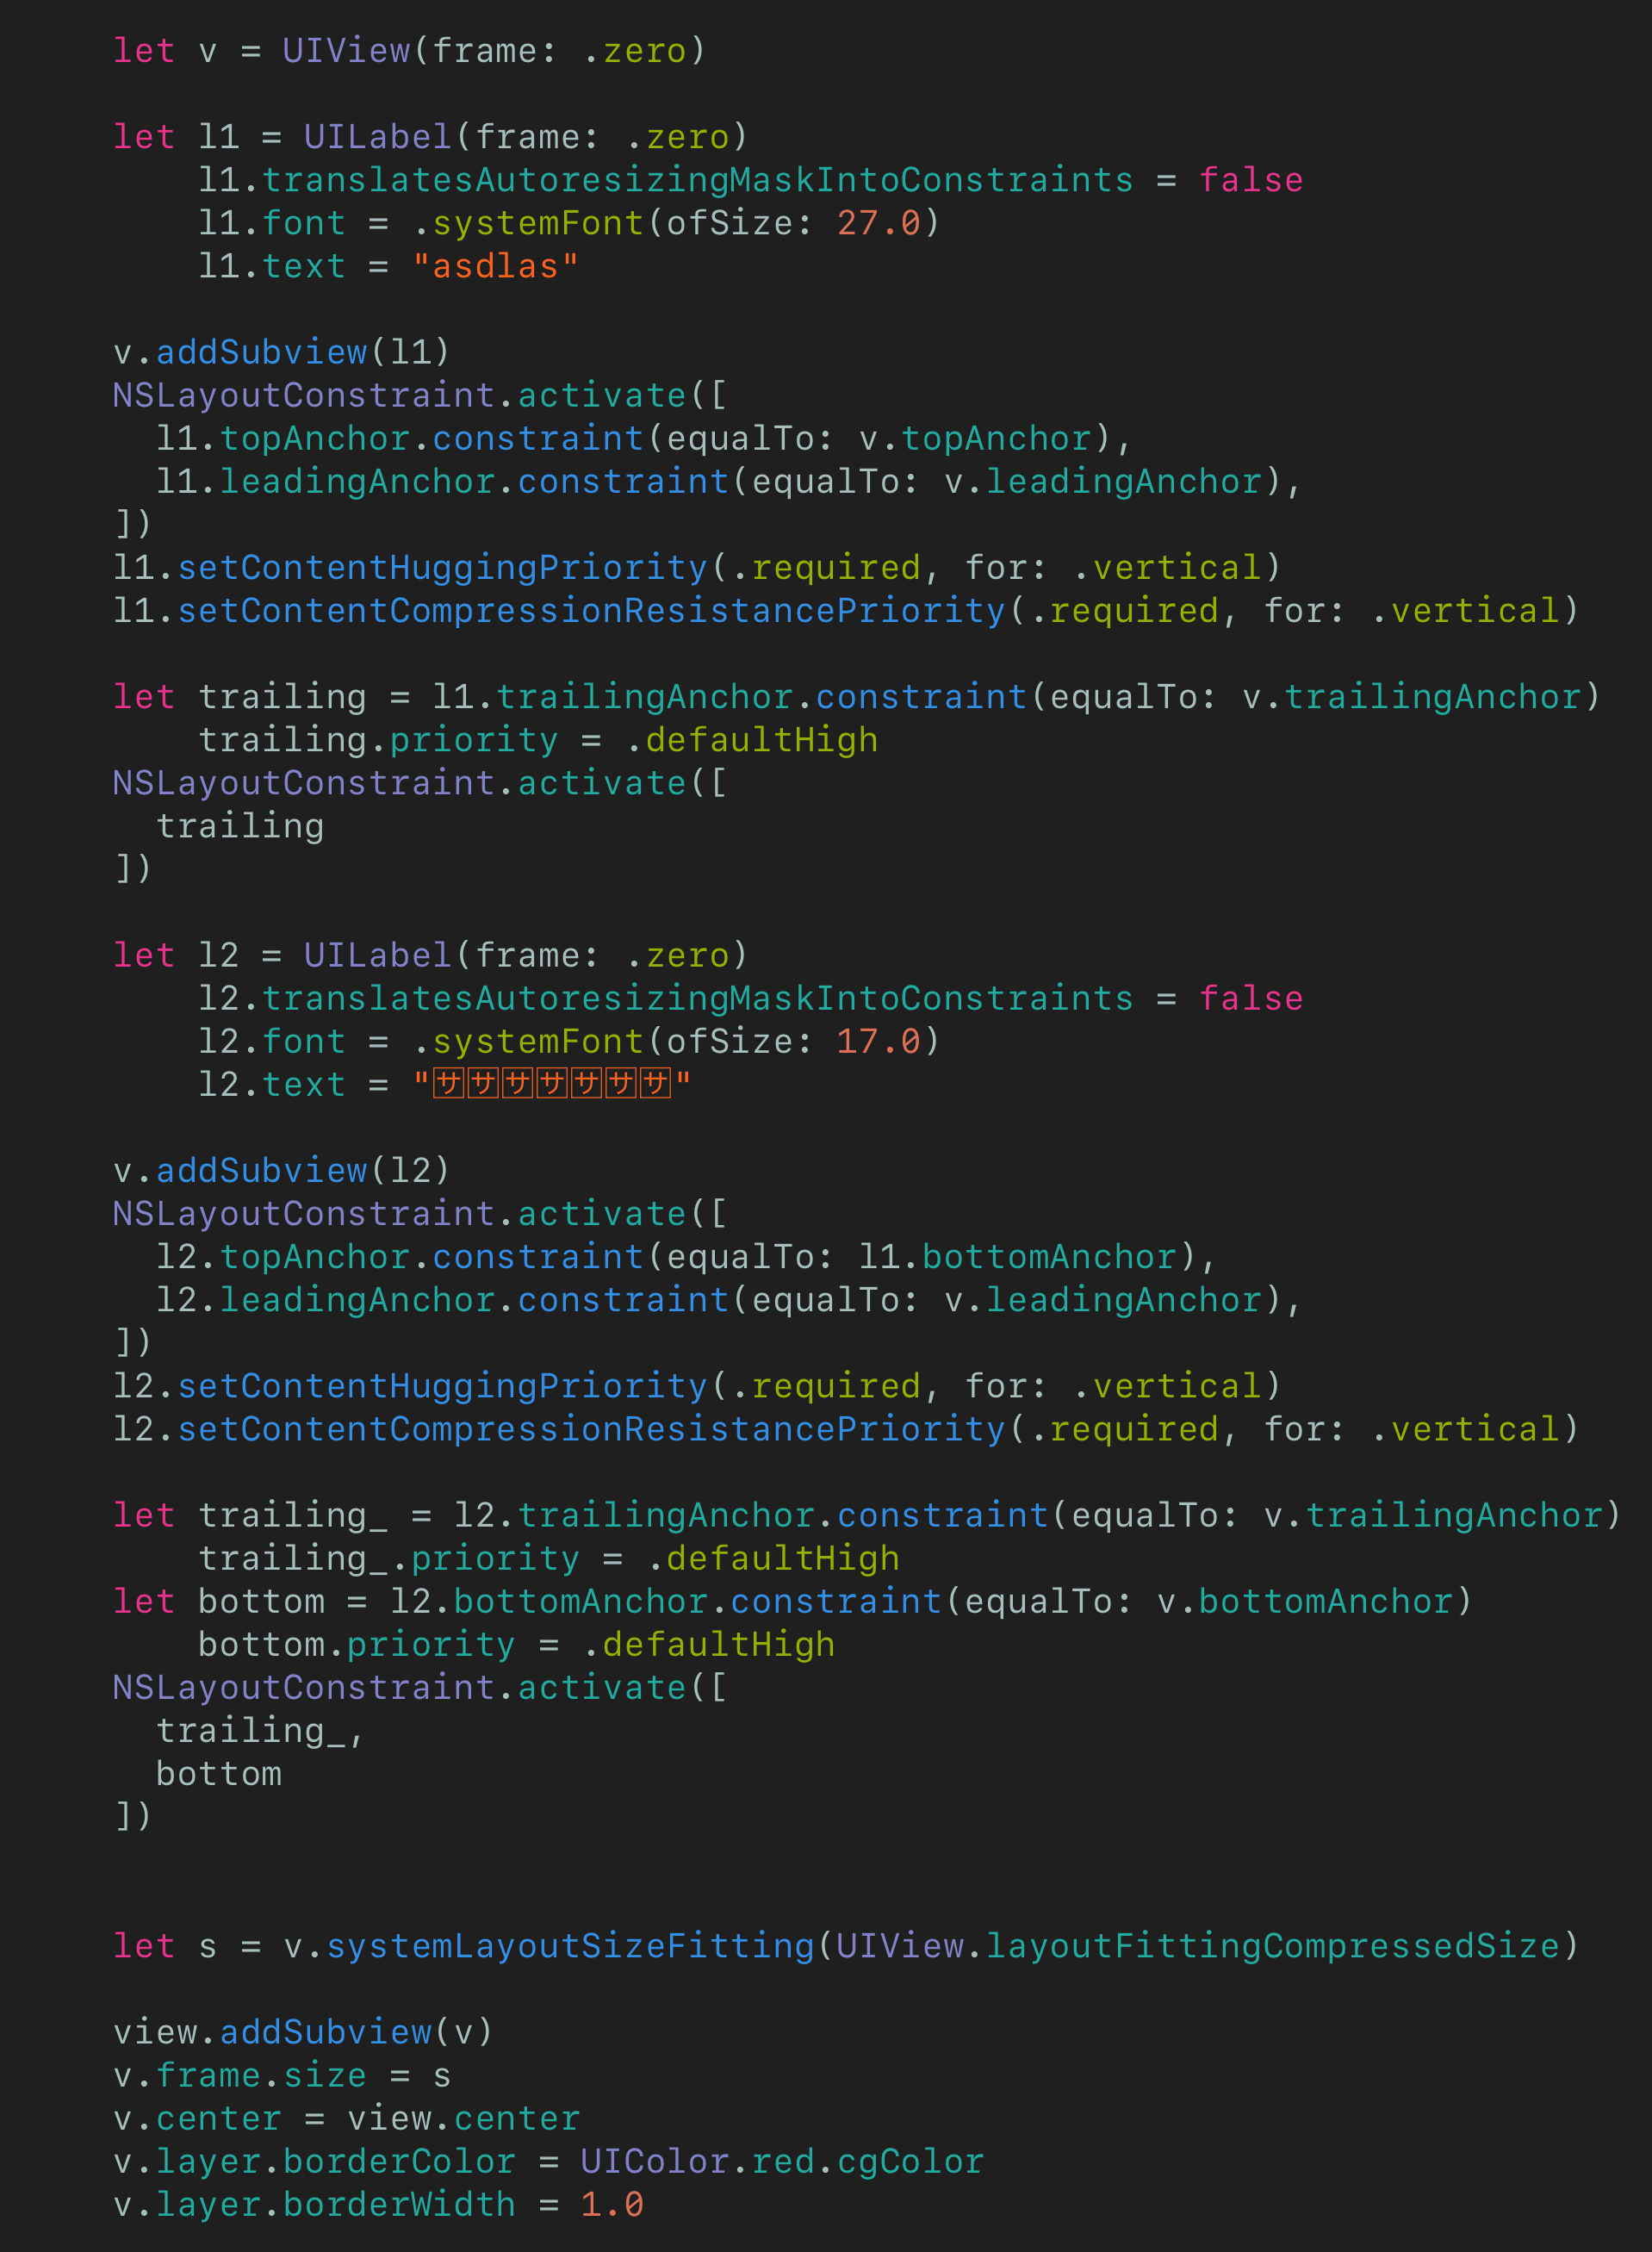
let v = UIView(frame: .zero)

    let l1 = UILabel(frame: .zero)
        l1.translatesAutoresizingMaskIntoConstraints = false
        l1.font = .systemFont(ofSize: 27.0)
        l1.text = "asdlas"

    v.addSubview(l1)
    NSLayoutConstraint.activate([
      l1.topAnchor.constraint(equalTo: v.topAnchor),
      l1.leadingAnchor.constraint(equalTo: v.leadingAnchor),
    ])
    l1.setContentHuggingPriority(.required, for: .vertical)
    l1.setContentCompressionResistancePriority(.required, for: .vertical)

    let trailing = l1.trailingAnchor.constraint(equalTo: v.trailingAnchor)
        trailing.priority = .defaultHigh
    NSLayoutConstraint.activate([
      trailing
    ])

    let l2 = UILabel(frame: .zero)
        l2.translatesAutoresizingMaskIntoConstraints = false
        l2.font = .systemFont(ofSize: 17.0)
        l2.text = ""

    v.addSubview(l2)
    NSLayoutConstraint.activate([
      l2.topAnchor.constraint(equalTo: l1.bottomAnchor),
      l2.leadingAnchor.constraint(equalTo: v.leadingAnchor),
    ])
    l2.setContentHuggingPriority(.required, for: .vertical)
    l2.setContentCompressionResistancePriority(.required, for: .vertical)

    let trailing_ = l2.trailingAnchor.constraint(equalTo: v.trailingAnchor)
        trailing_.priority = .defaultHigh
    let bottom = l2.bottomAnchor.constraint(equalTo: v.bottomAnchor)
        bottom.priority = .defaultHigh
    NSLayoutConstraint.activate([
      trailing_,
      bottom
    ])


    let s = v.systemLayoutSizeFitting(UIView.layoutFittingCompressedSize)

    view.addSubview(v)
    v.frame.size = s
    v.center = view.center
    v.layer.borderColor = UIColor.red.cgColor
    v.layer.borderWidth = 1.0

In principle, we make the usual contrasts, setting the top and leading. Noteworthy here is another point, namely trailing. Before assigning it, we made sure to set the resistance to compression and tension to both labels, thereby letting the system know that we want to see the label exactly as wide as it really is. After that, we make a trailing constraint and give it a priority slightly lower than 1000(required). By the way, maybe you don’t have to lower the priority in the storyboard. Check. (I think the system is doing it for you)
Width is done. Look at the costints for the height. It is quite usual here, we start with the top. After the bottom label is attached to the bottom of the first. And again a little magic. The last lower constraint is again with a lower priority. By the way, maybe you don’t have to lower the priority in the storyboard. Check. (It seems the system is doing it for you)
To be more precise, lowering the priority (at least if you set them in code), this approach makes it clear to the system that it should directly and completely calculate the height and width based on the height and width of its subviews, and not assign its own values.
Let's look at some examples:
The first one has a smaller font size but more characters.
The first has a larger font size, but morecharacters.
The first has a smaller font size but fewer characters.
The first has a larger font size but fewer characters.
Apparently the system considered the size of the view to be true. That is, we have dynamically learned to set the height and width of the cell.
Let's go further.
But there is one more small problem for cells. The collection layout system has all the necessary constructs, but it doesn't know anything about the data in these cells. But it is they who set the width of the cell. To do this, we need to give the system a little hint at some point in time.
Let's use the method:
5cab50033a6e2506454233.png
Text code
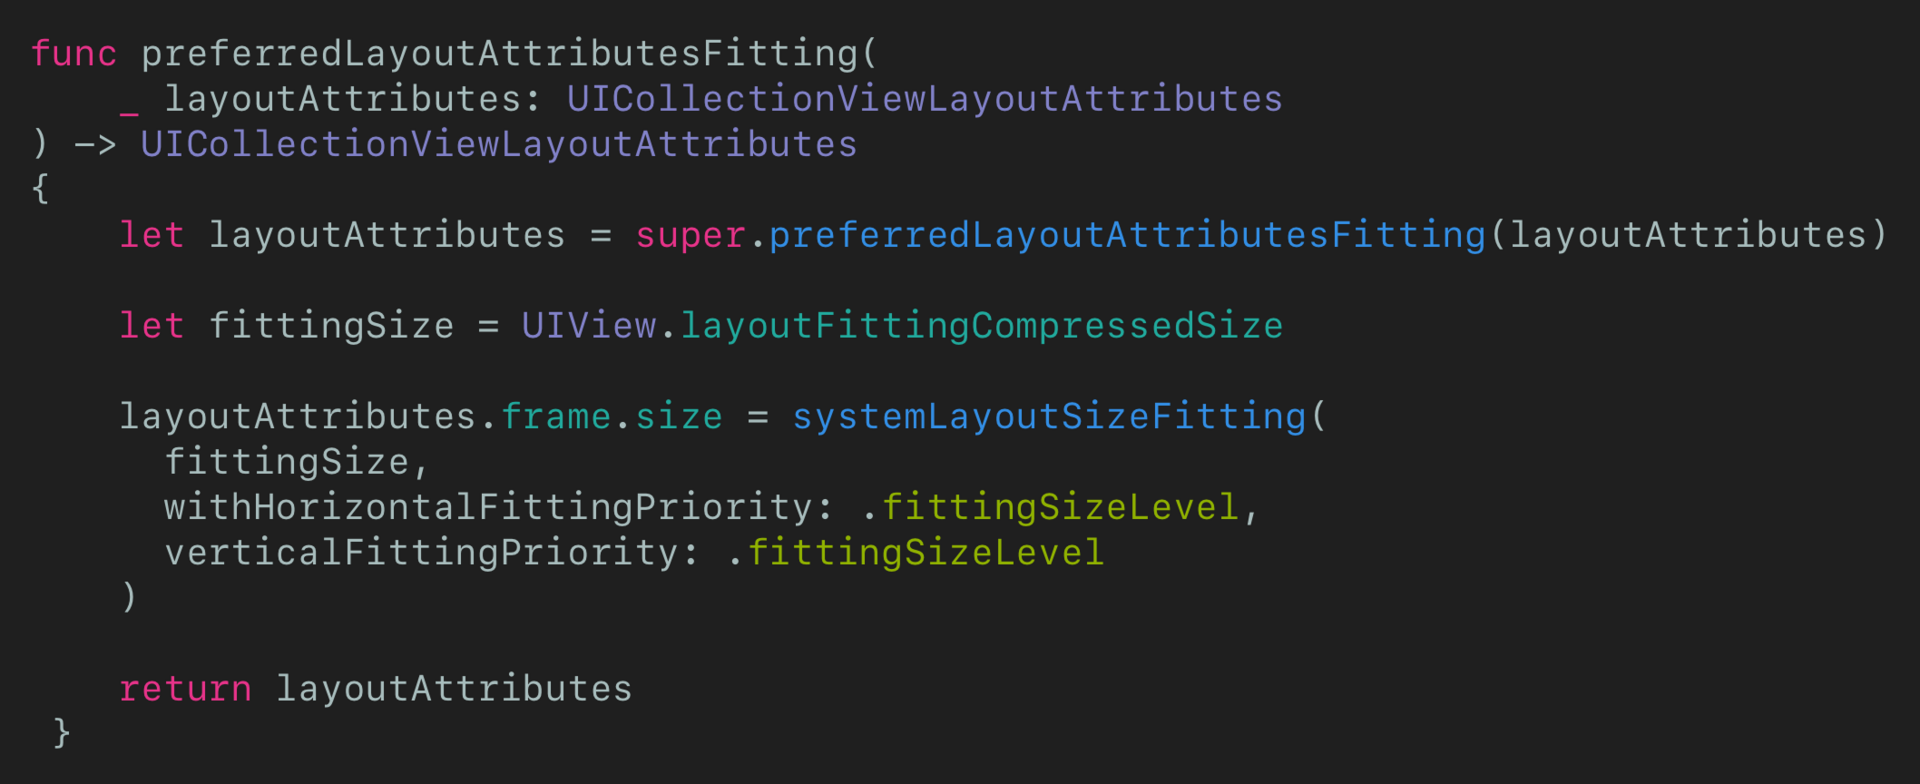
func preferredLayoutAttributesFitting(
    _ layoutAttributes: UICollectionViewLayoutAttributes
  ) -> UICollectionViewLayoutAttributes
  {
    let layoutAttributes = super.preferredLayoutAttributesFitting(layoutAttributes)

    let fittingSize = UIView.layoutFittingCompressedSize

    layoutAttributes.frame.size = systemLayoutSizeFitting(
      fittingSize,
      withHorizontalFittingPriority: .fittingSizeLevel,
      verticalFittingPriority: .fittingSizeLevel
    )

    return layoutAttributes
  }

Since we have all the constraints set up, we just have to ask the system to calculate the required sizes and transfer the new sizes to the collection layout system. At this point, by the way, the cell has already received all the data. (Text for labels)
And a small remark, perhaps in the preferredLayoutAttributesFitting method after calling super. you will need to add a call to the layoutIfNeeded() method . Or maybe not necessary.
Total:
Add what is in paragraph 1.
Set the necessary constraints.
Remove your code in step 3.
Add preferredLayoutAttributesFitting method

Didn't find what you were looking for?

Ask your question

Ask a Question

731 491 924 answers to any question